The BMW Alpina B7 manual is an essential guide for owners and enthusiasts‚ offering detailed insights into the vehicle’s features‚ maintenance‚ and performance capabilities.
1.1 Overview of the BMW Alpina B7
The BMW Alpina B7 is a high-performance luxury sedan that combines exceptional power with refined comfort. As a collaboration between BMW and Alpina‚ it offers a unique blend of sporty dynamics and premium amenities. The B7 features a powerful V8 engine‚ delivering impressive horsepower and torque‚ paired with an advanced 8-speed automatic transmission with manual shifting mode. Its sleek exterior design‚ aerodynamic enhancements‚ and opulent interior make it a standout in its class. With cutting-edge technology‚ including an intuitive infotainment system and advanced safety features‚ the Alpina B7 is tailored for discerning drivers who seek both exhilaration and elegance on the road.
1.2 Importance of the Manual for Owners and Enthusiasts
The BMW Alpina B7 manual is a critical resource for both owners and enthusiasts‚ providing detailed insights into the vehicle’s operation‚ maintenance‚ and performance capabilities. It serves as a comprehensive guide for understanding the car’s advanced features‚ troubleshooting issues‚ and ensuring optimal performance. For owners‚ the manual is essential for routine maintenance‚ warranty compliance‚ and maximizing the lifespan of the vehicle. Enthusiasts benefit from its technical specifications‚ allowing for customization and tuning. The manual also includes DIY maintenance tips‚ electrical diagrams‚ and bolt torques‚ making it an invaluable tool for those who want to personalize or upgrade their B7. It ensures a seamless driving experience and safeguards investments in this luxury sedan.

History of the BMW Alpina B7
The BMW Alpina B7’s history began with Alpina’s collaboration with BMW‚ producing high-performance variants. The B7 emerged as a luxury sedan‚ blending power with refinement‚ evolving successfully over decades.
2;1 Evolution of the Alpina B7 Model
The Alpina B7 model has undergone significant evolution since its introduction‚ with each generation enhancing performance and luxury. Early models featured powerful engines‚ while newer iterations incorporated advanced technologies like the 8-speed automatic transmission with manual shifting mode. The 2012 model‚ for instance‚ saw improvements in both power output and fuel efficiency. Additionally‚ the integration of Switch-Tronic technology in later models allowed for a sportier driving experience. The B7’s design has also evolved‚ with modern models boasting sleek aerodynamic enhancements and interiors that blend comfort with cutting-edge technology. This continuous refinement has solidified the B7’s position as a premier luxury sedan.
2.2 Key Milestones in the Development of the B7
The BMW Alpina B7 has reached several key milestones‚ marking its evolution as a high-performance luxury sedan. The 2007 model introduced a V8-4.4L supercharged engine‚ setting a benchmark for power. In 2012‚ the B7 featured an 8-speed automatic transmission with manual shifting mode‚ enhancing drivability. The 2017 model expanded with advanced technology‚ including a robust infotainment system. By 2020‚ the B7 achieved all-wheel-drive capability and a top speed of over 200 mph. These milestones reflect Alpina’s commitment to blending luxury with performance‚ solidifying the B7’s reputation as a premier vehicle in its class.
Technical Specifications of the BMW Alpina B7
The BMW Alpina B7 boasts an 8-speed automatic transmission with manual shifting mode‚ providing smooth and precise gear changes for optimal performance and control.
3;1 Engine and Performance Capabilities
The BMW Alpina B7 is powered by a robust V8 engine‚ delivering exceptional horsepower and torque. Its 4.4-liter supercharged V8 ensures a smooth and powerful driving experience‚ capable of achieving remarkable acceleration and top speeds. The engine’s advanced technology optimizes fuel efficiency while maintaining high performance. The B7’s powertrain is finely tuned to provide responsive acceleration‚ making it a standout in its class. With its powerful engine‚ the Alpina B7 combines luxury and performance seamlessly‚ offering drivers an unparalleled experience on the road. This model truly exemplifies the perfect blend of power and sophistication.
3.2 Transmission and Drivetrain Features
The BMW Alpina B7 features an advanced 8-speed automatic transmission with manual shifting mode‚ offering smooth and precise gear changes. Equipped with Switch-Tronic technology‚ drivers can enjoy manual gear selection for a sporty driving experience. The drivetrain is designed for optimal performance‚ with all-wheel drive providing enhanced traction and stability. This combination ensures superior acceleration and responsiveness‚ making the B7 a pleasure to drive. The transmission’s adaptability and the drivetrain’s efficiency contribute to both performance and fuel efficiency‚ catering to a wide range of driving conditions. This system is a testament to Alpina’s commitment to blending power with refined driving dynamics.

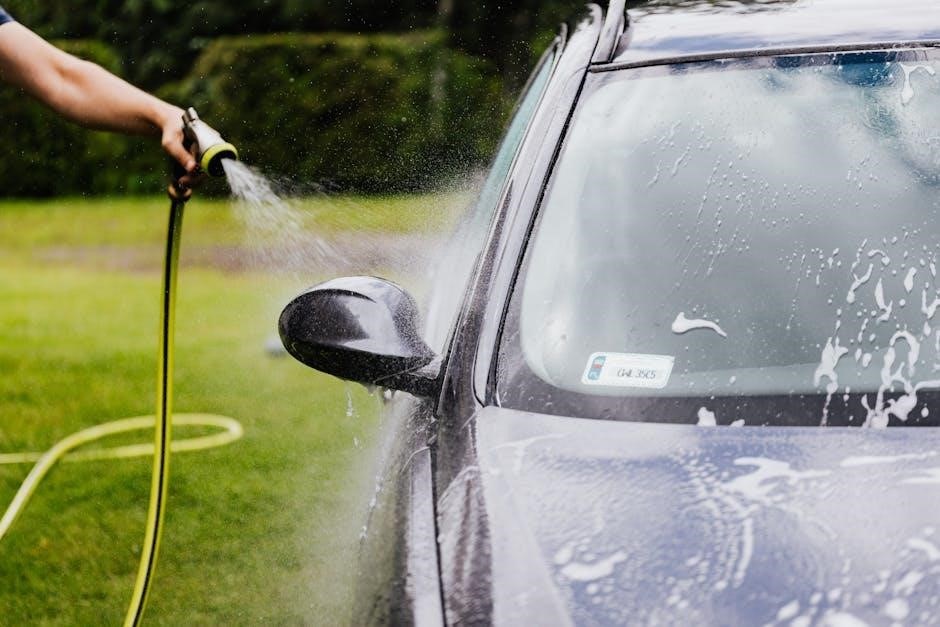
Maintenance and Service Guidelines
Regular servicing ensures optimal performance and longevity of the BMW Alpina B7. Follow scheduled maintenance and DIY care tips for routine checks and minor repairs.
4.1 Scheduled Maintenance Requirements
The BMW Alpina B7 requires regular maintenance to uphold its performance and reliability. Owners should adhere to the factory-recommended service schedule‚ which includes oil changes every 5‚000 to 7‚500 miles‚ tire rotations‚ and inspections of brakes and suspension components. Additionally‚ the manual advises checking fluid levels‚ air filters‚ and belts at specified intervals. Proper adherence to these guidelines ensures the vehicle operates within optimal parameters‚ preventing premature wear and potential costly repairs. DIY maintenance tips are also provided for minor tasks‚ allowing owners to stay proactive in maintaining their B7’s health and longevity on the road.
4.2 DIY Maintenance Tips for B7 Owners
DIY maintenance for the BMW Alpina B7 can enhance owners’ connection with their vehicle while saving costs. Regular oil changes‚ tire rotations‚ and fluid checks are essential. Owners can inspect air filters and replace them as needed to maintain optimal engine performance. Additionally‚ checking brake pads androtors periodically ensures safety and reliability. Simple tasks like cleaning sensors and ensuring proper tire pressure can significantly improve fuel efficiency and handling. The manual provides detailed instructions for these tasks‚ empowering owners to take charge of minor maintenance. By following these tips‚ B7 owners can extend their vehicle’s lifespan and maintain its luxurious performance capabilities without professional assistance.

Repair and Service Manuals
Repair and service manuals for the BMW Alpina B7 provide comprehensive guides for maintenance and repairs‚ ensuring optimal performance and longevity of the vehicle.
5.1 2007 BMW Alpina B7 (E65) V8-4.4L SC (N62) Repair Manual
The 2007 BMW Alpina B7 (E65) V8-4.4L SC (N62) repair manual is a detailed resource for servicing and repairing this high-performance luxury sedan. It includes electrical diagrams‚ bolt torques‚ and labor estimates‚ ensuring precise repairs. Whether addressing engine issues or suspension components‚ this manual provides step-by-step instructions. It covers the supercharged V8 engine‚ unique to the B7‚ and offers insights into maintaining its exceptional performance. DIY enthusiasts and professional mechanics alike can rely on this manual to keep the Alpina B7 in peak condition‚ preserving its power and luxury for years to come.
5.2 2012 BMW Alpina B7 Service and Repair Manual
The 2012 BMW Alpina B7 service and repair manual is a comprehensive guide tailored for this model year‚ offering precise instructions for maintenance and repairs. It covers the 4.4L V8 engine‚ 8-speed automatic transmission‚ and advanced drivetrain features. Detailed diagrams and troubleshooting sections ensure accurate diagnostics. The manual also includes scheduled maintenance plans and tips for optimizing performance. Whether addressing routine service or complex repairs‚ this resource is indispensable for both DIY enthusiasts and professional mechanics. It ensures the B7’s luxury and power are preserved‚ making it a must-have for owners seeking reliability and peak performance.
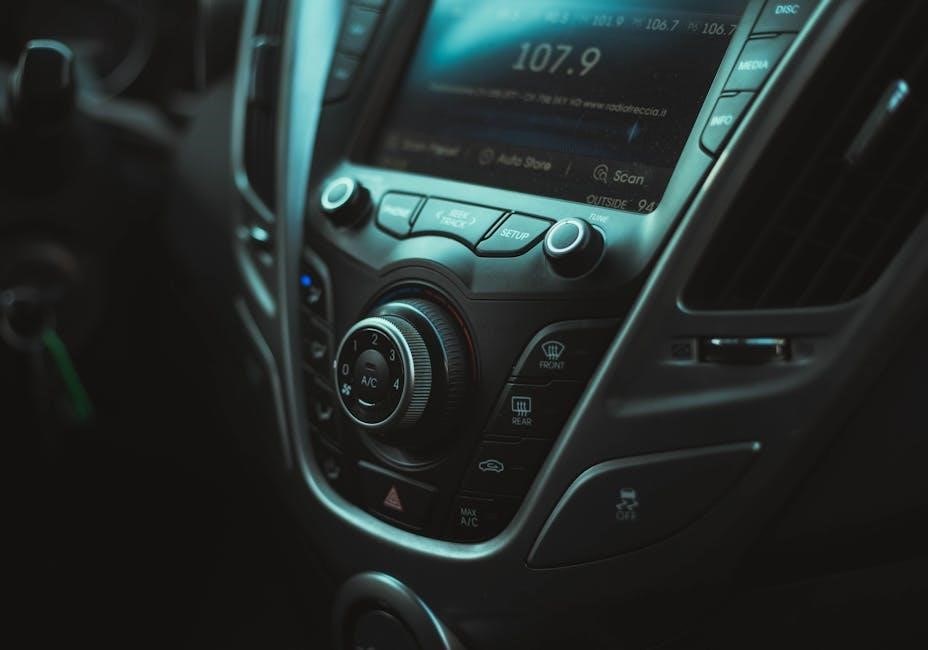
Owner’s Manual Sections
The BMW Alpina B7 owner’s manual includes detailed guides for the infotainment system‚ navigation‚ and control systems‚ ensuring drivers can fully utilize the vehicle’s advanced features effortlessly.
6.1 Infotainment System Guide
The BMW Alpina B7 infotainment system guide provides comprehensive instructions for navigating the advanced multimedia features. Owners can learn how to operate the high-resolution display‚ access various entertainment options‚ and integrate smartphones seamlessly. The manual details steps for setting up Bluetooth connectivity‚ using voice commands‚ and managing audio settings. Additionally‚ it covers the iDrive system‚ highlighting shortcuts and customization options for a personalized experience. Troubleshooting tips are also included to address common issues‚ ensuring uninterrupted enjoyment of the vehicle’s entertainment and information technologies.
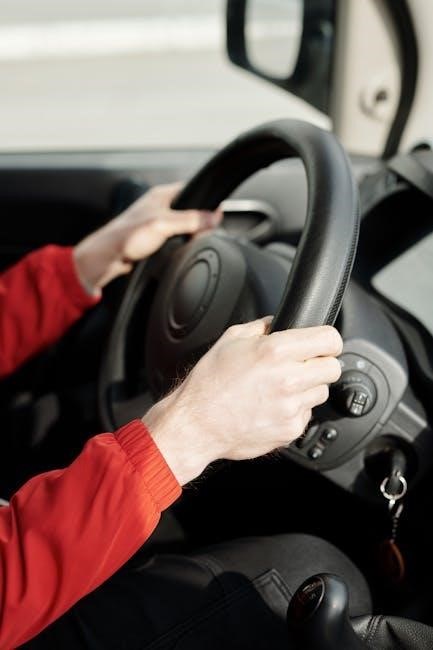
6.2 Navigation and Control Systems
The BMW Alpina B7 manual provides detailed guidance on the navigation and control systems‚ enabling drivers to optimize their driving experience. The system features voice-command functionality‚ real-time traffic updates‚ and customizable map views. Controls are intuitively designed‚ with the iDrive controller and steering wheel buttons offering easy access to navigation‚ audio‚ and phone functions. The manual explains how to set waypoints‚ use gesture controls‚ and integrate smartphone apps for enhanced connectivity. Additionally‚ it covers advanced safety features like adaptive cruise control and lane-keeping assist‚ ensuring a seamless and safe driving experience. Mastering these systems enhances both convenience and safety on the road.

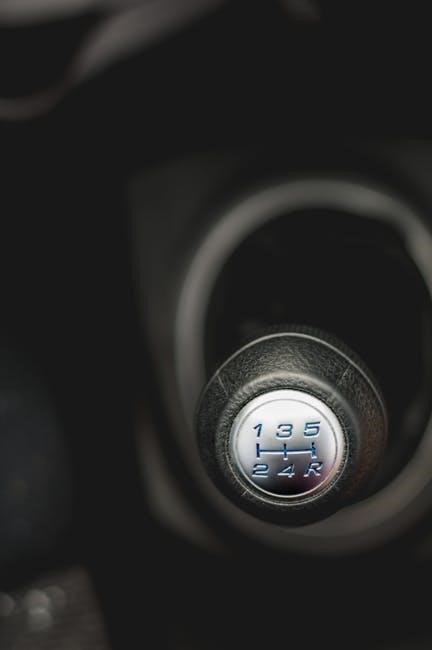
Transmission and Gearbox Details
The BMW Alpina B7 features an 8-speed automatic transmission with manual shifting mode‚ offering smooth and responsive gear changes for enhanced performance and driving control.
7.1 8-Speed Automatic Transmission with Manual Shifting Mode
The BMW Alpina B7 is equipped with an advanced 8-speed automatic transmission‚ designed to deliver seamless power delivery and precise gear shifts. This transmission features a manual shifting mode‚ allowing drivers to take control of gear changes for a more engaging driving experience. The system integrates perfectly with the vehicle’s performance capabilities‚ ensuring optimal acceleration and responsiveness. Additionally‚ the manual shifting mode enhances fuel efficiency by enabling drivers to adjust gear ratios according to driving conditions. This combination of automatic convenience and manual control makes the B7 a versatile choice for both everyday driving and spirited performance.
7.2 Switch-Tronic Technology for Manual Gear Selection
The BMW Alpina B7 features Switch-Tronic technology‚ enabling manual gear selection for a sporty driving experience. This system allows drivers to shift gears manually using steering-wheel-mounted paddles or the gear selector‚ providing precise control over the 8-speed automatic transmission. Switch-Tronic enhances driver engagement by delivering quick and responsive shifts‚ particularly in Sport mode. The technology seamlessly integrates with the vehicle’s adaptive transmission logic‚ ensuring smooth transitions and optimized performance. Whether cruising in Comfort mode or pushing the limits on a winding road‚ Switch-Tronic offers the perfect balance of convenience and driver involvement‚ making it a standout feature of the B7’s drivetrain.
Luxury and Comfort Features
The BMW Alpina B7 offers premium luxury with its ergonomic design‚ advanced infotainment systems‚ and high-quality materials‚ ensuring a refined and comfortable driving experience for all passengers.
8.1 Interior Design and Amenities
The BMW Alpina B7 boasts a meticulously crafted interior‚ featuring premium leather upholstery‚ heated and ventilated seats‚ and a panoramic moonroof for enhanced comfort and ambiance. The cabin is adorned with fine wood trim and aluminum accents‚ reflecting a blend of elegance and sportiness. The infotainment system includes a high-resolution touchscreen‚ navigation‚ and a Harman Kardon surround sound system‚ ensuring an immersive entertainment experience. Additionally‚ the B7 offers ample legroom and cargo space‚ making it a practical choice for both daily driving and long-distance trips. These amenities collectively create a luxurious environment tailored to discerning drivers and passengers alike.
8.2 Advanced Technology and Safety Features
The BMW Alpina B7 is equipped with cutting-edge technology and advanced safety features‚ ensuring a seamless and secure driving experience. The infotainment system boasts a high-resolution touchscreen display‚ voice command functionality‚ and seamless smartphone integration via Apple CarPlay and Android Auto. Safety features include adaptive cruise control‚ lane departure warning‚ and automatic emergency braking‚ which work in tandem to prevent accidents. Additionally‚ the B7 offers a 360-degree camera system and parking sensors for enhanced visibility and precision. These technologies not only enhance safety but also elevate the overall driving pleasure‚ making the B7 a standout in its class.
Performance and Handling
The BMW Alpina B7 delivers exceptional performance with its 8-speed automatic transmission and manual shifting mode‚ offering precise control and exhilarating acceleration‚ reaching top speeds effortlessly.
9.1 Acceleration and Top Speed Capabilities
The BMW Alpina B7 showcases remarkable acceleration‚ achieving 0-60 mph in just 4.3 seconds. Its powerful engine‚ combined with the 8-speed automatic transmission‚ enables a top speed of 205 mph‚ delivering a blend of luxury and high performance seamlessly. The manual shifting mode further enhances driver control‚ allowing precise gear changes to maximize power delivery. This capability makes the B7 a standout in its class‚ offering both exceptional speed and refined handling for an unparalleled driving experience. The vehicle’s aerodynamic design and advanced engineering contribute to its impressive performance metrics‚ solidifying its reputation as a high-performance luxury sedan.
9.2 Suspension and Steering Performance
The BMW Alpina B7 features an adaptive air suspension system‚ providing exceptional ride comfort and precise handling. The suspension automatically adjusts to driving conditions‚ ensuring stability at high speeds and a smooth ride in urban environments. The active roll stabilization minimizes body lean during cornering‚ enhancing agility. The steering system‚ equipped with integral active steering‚ offers precise control and responsiveness‚ particularly during dynamic driving. These advanced systems work in harmony to deliver a balanced blend of comfort and sporty handling‚ making the B7 a versatile performer on both highways and winding roads. The suspension and steering systems are finely tuned to complement the vehicle’s powerful engine and transmission.

Exterior Design and Aerodynamics
The BMW Alpina B7 boasts a sleek‚ aerodynamic design with a sporty stance‚ featuring lightweight materials and aerodynamic spoilers to enhance airflow and reduce drag.
10.1 Body Style and Aerodynamic Enhancements
The BMW Alpina B7 features a streamlined body style with aerodynamic enhancements‚ including a lowered front splitter and rear diffuser‚ which improve downforce and reduce drag. The sedan’s silhouette is both elegant and sporty‚ with precise lines that enhance its dynamic appearance. The use of lightweight materials contributes to better performance and efficiency. Additionally‚ the B7’s aerodynamic design includes subtle spoilers and air curtains to optimize airflow‚ ensuring stability at high speeds. These enhancements not only improve handling but also underscore the vehicle’s aggressive yet refined aesthetic appeal‚ making it a standout in its class.
10.2 Wheel and Tire Options
The BMW Alpina B7 offers a range of wheel and tire options‚ combining style and performance. Standard 20-inch forged alloy wheels provide strength and a sleek appearance‚ while optional 21-inch wheels enhance both aesthetics and handling. Tire selections include high-performance rubber designed for grip and responsiveness‚ ensuring optimal traction in various driving conditions. Seasonal tire packages are also available‚ catering to different climates and driving preferences. The B7’s wheel and tire configurations are tailored to complement its aerodynamic design and luxury appeal‚ offering owners the perfect blend of form and function to match their lifestyle and driving demands.
Owner’s Manual for Specific Models
The BMW Alpina B7 owner’s manual is tailored for specific models like the 2013 SWB and 2017 G11/G12‚ providing detailed guidance for each variant’s unique features.
11.1 2013 BMW Alpina B7 SWB Owner’s Manual
The 2013 BMW Alpina B7 SWB owner’s manual offers comprehensive guidance tailored to this specific model; It covers features unique to the SWB variant‚ such as its sport-tuned suspension and exclusive interior options. The manual provides detailed instructions for operating the infotainment system‚ navigation‚ and advanced driver-assistance technologies. Additionally‚ it includes maintenance schedules‚ troubleshooting tips‚ and explanations of the Switch-Tronic technology for manual gear selection. Owners can find everything from setting up the customizable driving modes to understanding the performance-enhancing features of this high-powered sedan. This manual is essential for maximizing the driving experience and maintaining the vehicle’s premium condition.
11.2 2017 BMW Alpina B7 Owner’s Manual for G11‚ G12
The 2017 BMW Alpina B7 owner’s manual for G11 and G12 models is designed to help owners optimize their driving experience. It provides detailed instructions for the advanced infotainment system‚ navigation‚ and customizable driver modes. The manual also covers maintenance schedules‚ troubleshooting procedures‚ and explanations of the vehicle’s unique features‚ such as the Switch-Tronic technology for manual gear selection. Owners can learn how to personalize settings‚ utilize safety features‚ and understand the performance capabilities of the B7. This comprehensive guide is essential for getting the most out of the 2017 Alpina B7‚ ensuring both convenience and peak performance.

Purchase and Ownership Guide
Buying a used BMW Alpina B7 requires research on market value‚ history‚ and condition. Ownership involves balancing luxury with maintenance costs for optimal performance and longevity.
12.1 Buying a Used BMW Alpina B7
When purchasing a used BMW Alpina B7‚ thorough research is essential. Check the vehicle’s history for any accidents or major repairs. Inspect the interior and exterior for signs of wear. Review maintenance records to ensure all scheduled services were performed. A pre-purchase inspection by a certified mechanic is highly recommended. Test drive the car to assess performance and comfort. Consider certified pre-owned options for added warranty benefits. Compare prices across multiple listings to ensure a fair deal. Ensure all original manuals and keys are included. Be cautious of low-priced offers that may indicate hidden issues. Prioritize well-maintained models for long-term reliability and satisfaction.
12.2 Cost of Ownership and Maintenance
Owning a BMW Alpina B7 involves significant costs‚ including premium fuel‚ insurance‚ and maintenance. Regular servicing by certified technicians is crucial‚ with intervals every 12‚000 to 15‚000 miles. Expect higher parts costs due to the car’s luxury and performance nature. Tire replacements‚ especially for high-performance models‚ can be expensive. Annual insurance premiums are substantial‚ reflecting the vehicle’s value. Depreciation should be considered‚ though the B7 retains value well. Budgeting for unexpected repairs‚ such as advanced electrical systems‚ is wise. Overall‚ while rewarding‚ the B7 demands a considerable financial commitment for upkeep and operation.

Repair Manuals and Literature
Repair manuals for the BMW Alpina B7 provide detailed instructions‚ electrical diagrams‚ and bolt torque specifications‚ ensuring comprehensive guidance for maintenance and repairs.
13.1 Detailed Repair Manual for 2007 BMW Alpina B7 (E65)
The 2007 BMW Alpina B7 (E65) repair manual offers a comprehensive guide for servicing and repairing the V8-4.4L SC (N62) engine. It includes detailed electrical diagrams‚ recommended bolt torque specifications‚ and estimated labor times. This manual is essential for both DIY enthusiasts and professional mechanics‚ providing precise instructions for maintaining and restoring the vehicle’s performance. With step-by-step procedures and technical insights‚ it ensures accurate repairs and upgrades. Whether addressing engine issues or fine-tuning suspension‚ this manual is an indispensable resource for anyone working on the 2007 Alpina B7.
13.2 Electrical Diagrams and Bolt Torques
The BMW Alpina B7 repair manual includes detailed electrical diagrams and bolt torque specifications‚ essential for precise repairs and maintenance. These diagrams provide a clear visual representation of the vehicle’s electrical systems‚ helping technicians and enthusiasts identify and troubleshoot issues efficiently. Bolt torque specifications are meticulously listed‚ ensuring that all components are secured to factory-recommended standards. This section is particularly useful for those working on complex systems like the engine‚ suspension‚ and drivetrain. By following the guidelines‚ users can maintain the vehicle’s performance and safety‚ avoiding potential damage from over- or under-tightening critical bolts.
The BMW Alpina B7 manual is a comprehensive guide‚ covering performance‚ maintenance‚ and troubleshooting. It empowers owners and technicians to optimize the vehicle’s potential‚ ensuring safety and longevity. Resources for further support are also provided.
14.1 Final Thoughts on the BMW Alpina B7 Manual
The BMW Alpina B7 manual is a vital resource for owners‚ offering comprehensive guidance on performance‚ maintenance‚ and troubleshooting. It provides detailed insights into the vehicle’s advanced features‚ ensuring optimal functionality and longevity. With clear instructions and technical specifications‚ the manual empowers users to address common issues and enhance their driving experience. Whether for routine maintenance or complex repairs‚ the manual serves as an indispensable companion. Its structured approach ensures that both novice and experienced enthusiasts can navigate the content effortlessly‚ making it an essential tool for anyone seeking to maximize the potential of their BMW Alpina B7.
14.2 Resources for Further Reading and Support
For further exploration‚ enthusiasts can access detailed reviews and guides from reputable sources like Car and Driver‚ offering insights into the BMW Alpina B7’s performance and features. Repair Surge provides comprehensive repair manuals‚ while eBay offers a wide selection of repair manuals and literature. Additionally‚ BMW’s official website and authorized dealerships supply genuine manuals and parts‚ ensuring authenticity and reliability. Online forums and communities dedicated to BMW and Alpina models also serve as valuable platforms for shared knowledge and troubleshooting. These resources collectively provide a robust support network for owners seeking to enhance their understanding and maintenance of the BMW Alpina B7.